Table of Contents

Library
The web library contains your tracks, routes, and points. It is synchronized with the Locus Map app on your smartphone or tablet. It can be synced with multiple devices running the same Locus account.
Before you can use the library:
- Sign up to the Locus account in Locus Map mobile app.
- Subscribe to or purchase Premium Gold package.
- Run the first synchronization in the app.
- Log in to the Locus account on the web
Structure
The library uses the same structure of folders and subfolders as your Locus Map app with which it is synchronized:
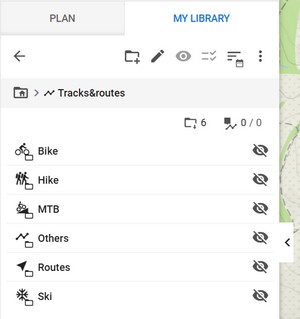
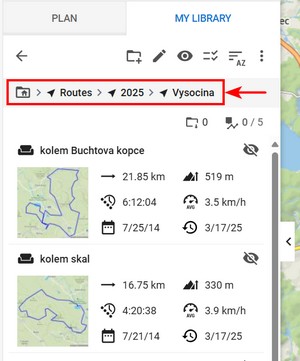
The structure of subfolders is visualized in a breadcrumb navigation. Each of the subfolders in the row is clickable, and you can get into any subfolder level you want:
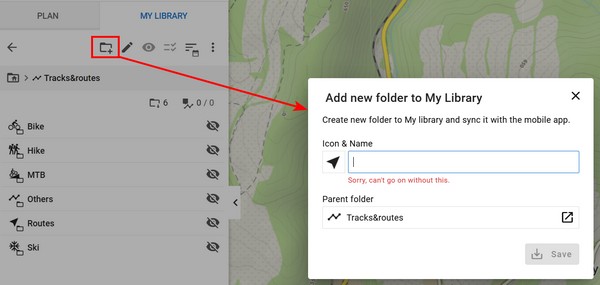
Adding folders
To add a new folder to the library, tap the New folder button. Fill in the folder name; the parent folder is pre-filled, as well as the track line style (by default, it is adopted from the parent folder; otherwise, it can be set individually:
Folder
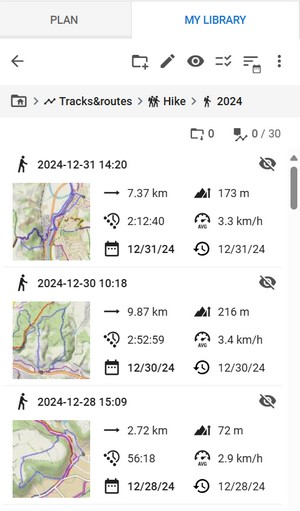
Tracks, routes and points are stored in folders. The content of a folder is displayed in a column. Each track line displays a preview, length, elevation gain, time, average speed, date of creation and date of update:
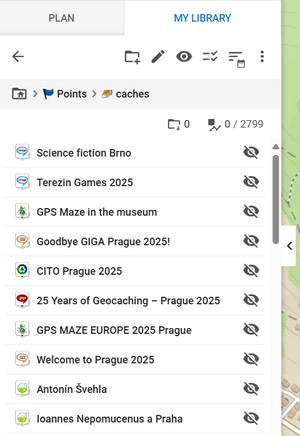
Each point line displays just an icon and the name of the point:
Ordering
By default, the list of items in the folder is ordered by date of creation. You can change this by tapping the sorting button:
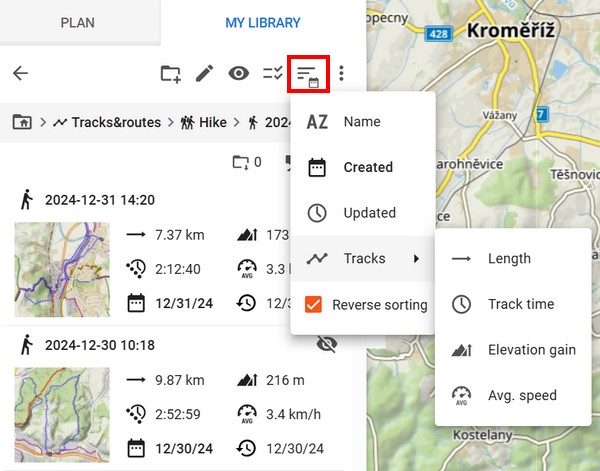 All sorting methods can also be reversed.
Editing
To edit the folder name, icon, track line style and change its parent folder, tap the Edit button:
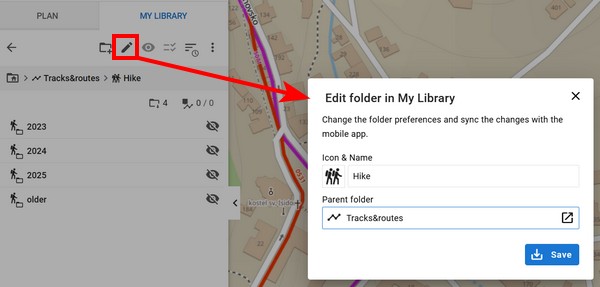
The line style can be set per folder individually or it can adopt the style from the parent folder. The same way as it is in the mobile app.
When you are done, tap SAVE.
Deleting
The deleting button is by default deactivated:
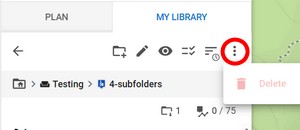
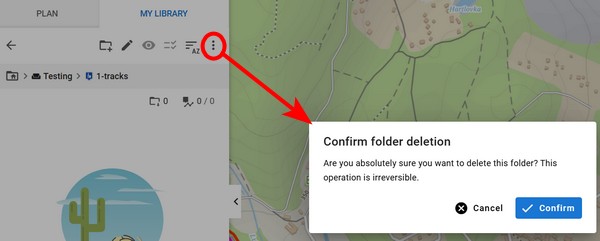
To remove a folder, you have to empty it first - delete or move all its content. Then the deleting button becomes active and tapping it displays deletion confirmation:
Displaying content on the map
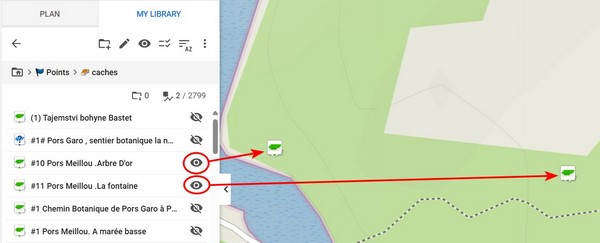
To display tracks or points on the map, click on their eye buttons. You can display single items, multiple selections, or whole folders.
Single and multiple items
Open a folder and tap the eye buttons next to all the tracks, routes, and points that you want to display on the map:
Whole folder
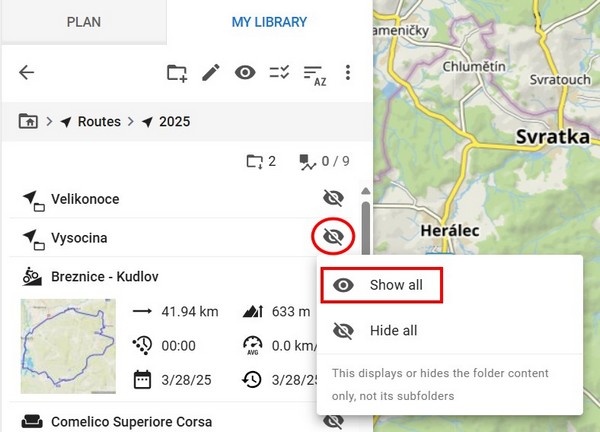
- tap an eye on the folder line
- tap show all in the popup:
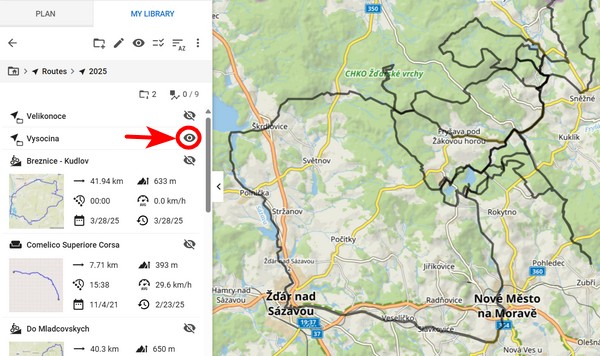
- to hide all, do the same in reverse and select the hiding option
Batch operations
If you want to work with multiple items in a folder, turn the multiple-choice mode on. Selecting checkboxes appear on the left side and also a set of tools below:
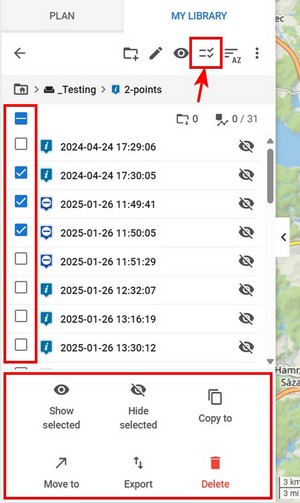
- check the items you want to process
- select the action (copy, move, export, delete)
- if you want to copy or move, select also the target folder
Tracks and routes
Detail panel
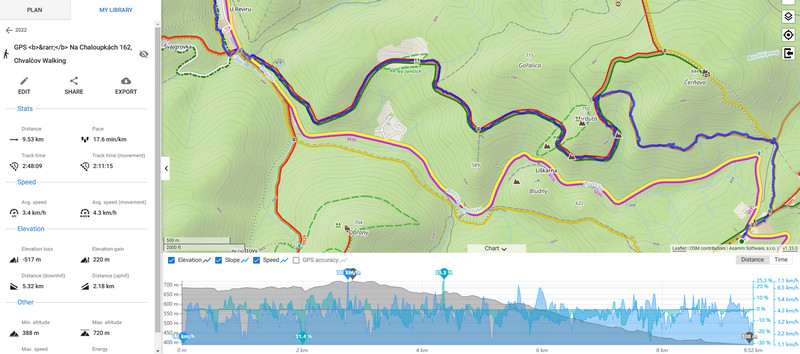
To open a track/route detail, click on the track in the folder. The detail displays a full map with the track, a chart with elevation, slope, speed, and GPS accuracy (recorded track), and a panel with statistics:
Edit
To change the track/route's info or course, click edit:
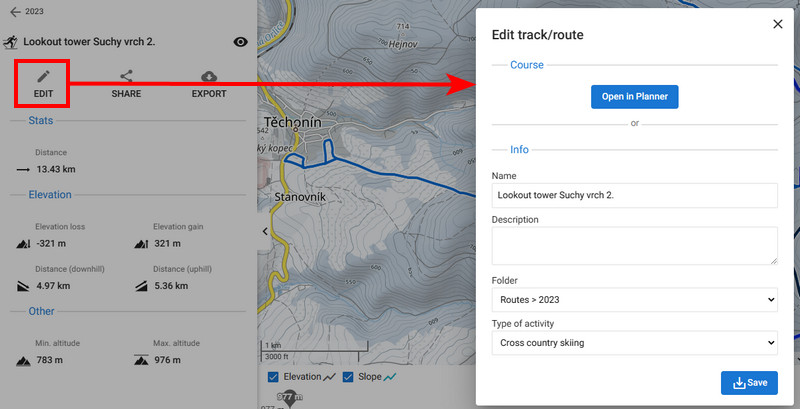
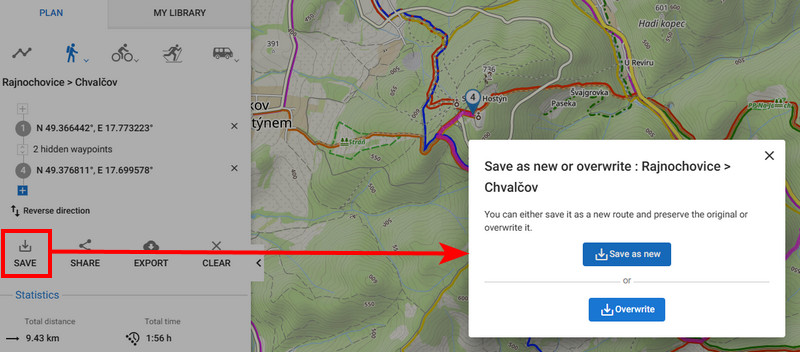
You can edit the name and description, and change the folder, activity type and line style. If you want to edit the route's course, click Open in Planner. When you're finished, you are given two options: to save the route as new or rewrite the original:
Line style
The track/route line style can be defined individually or per folder the same way as it is in the mobile apps. When the folder style is on, the track adopts its style:
 When the folder style is off, you can define the color, size, pattern, outline, etc. of the individual track:

Delete
If you want to delete a track or route, tap Delete in the track details on the library tab:
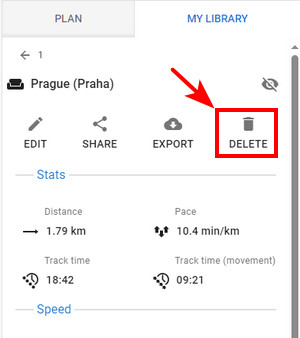
This action is irreversible, and the track/route is also deleted in your linked Locus Map app.
Import
You can import tracks and routes in GPX format. More details >>
Points
Detail panel
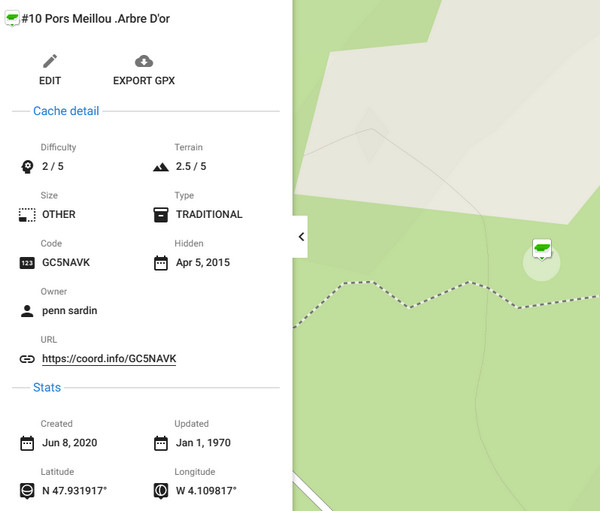
To open a point detail, click on the point in the folder. The point is centered on the map, and its detailed info is displayed on the panel:
Edit & delete
To edit your own point on the map, open its details and click Edit:
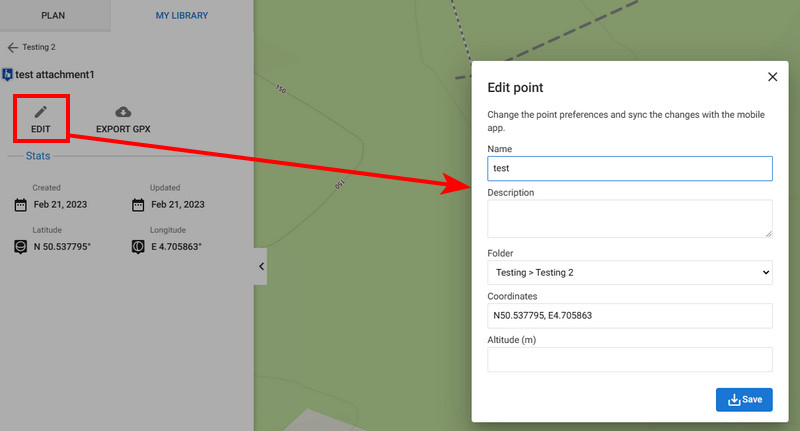
You can change its name, description, coords, altitude or move it to another folder. Saving the point overwrites the original.
If you want to delete a point, tap Delete:
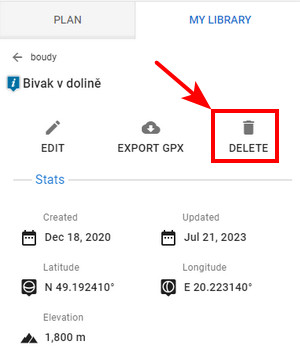
This action is irreversible, and the point is also deleted in your linked Locus Map app.
Creating a new point
If you want to add a new point on the map:
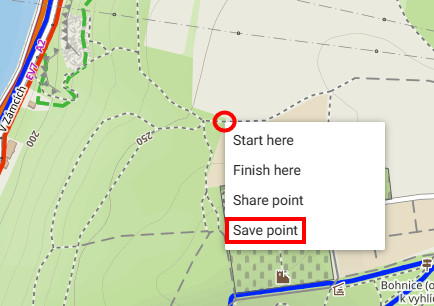
- right-click the map at the spot where you want to place the point
- click Save point
- select the icon (optional - by default, the point inherits the icon from the folder into which it is stored), enter the name (optional - by default, there is an address), and the folder into which you want to save the point. Other items are optional:

- the point is saved into the library, and if you didn't edit the icon, it adopts the icon of its folder:


LoPoint copy
You can also save a LoPoint into your library. Hover the cursor over the LoPoint icon and click save from the pop-up menu:
