Translated from English by gtranslate.io
Sidebar
manual:user_guide:settings:backup_fsys
This is an old revision of the document!
Table of Contents
Backup & filesystem
File system manager
Allows customizing Locus Map default working directories.
Set the main directory
Android 11+
The app is forced to have the main directory in its private folder in /Android/data/ system directory. Either in the internal storage or on the external SD card.
By default, Locus main directory is stored in the root of your device's internal storage. You can move it also to the private directory both in the inner storage or on external SD card:

- tap the selected option
- tap “MOVE”
- the app calculates the size of the data for transfer
- app transfers the data to the new location
- app requires restart
If you want only to select a different location for the main app directory - without data transfer - tap ![]() menu next to the selected option and then tap select:
menu next to the selected option and then tap select:

Set custom sub-directories
Some sub-directories can be placed out of the default main directory.

1) in the app private folders (either in internal storage or external SD card):
- /Maps/ - raster maps
- /MapsOnline/ - definition files, temp data of online maps
- /geocaching/ - user images, spoilers, HTML listings, offlinized data etc.
2) anywhere in the device storage:
- /MapsVector/ - vector maps, e.g. LoMaps or OpenAndroMaps
- /SRTM/ - offline elevation dat
- /Backup/ - ZIP files with backup of tracks, routes, points and settings
Cloud synchronization
Available only with Premium Gold
About
Tracks, routes and points can be synchronized across many devices through our cloud sync service. This is done automatically always after any change made to the database - when a track is recorded, route planned, a point imported… The sync unifies the database content with all other devices running the same Google account.
First sync
- take the device on which you have the oldest Locus data (tracks, routes, points). This device should ideally have all your complete data
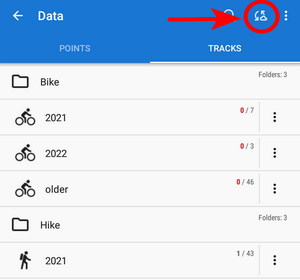
- open your track/point manager and tap the sync button in the topbar:
- confirm manual synchronization and let it go all the way through:

- your personal database on the cloud has been created – you can sync other devices or plan/save routes in the web planner
Automatic sync
After the first sync, the automatic synchronization is turned on by default. If any change happens to your database (track is recorded or imported, a route is planned, points are imported…), it is immediately synced with the cloud.
Automatic sync can be turned off in the settings.
How does sync work?
The synchronization algorithm is based on modification time. The last modification wins. During each synchronization, the data from your mobile phone and data in the cloud are compared. Based on modification time, it is decided what action will be done (none, upload, download, delete locally, delete on the server, …). It doesn't matter how many devices you have. The synchronization mechanism is still the same.
But you should be careful about one situation - during a sync process on multiple devices also DELETINGS are synchronized. That means when you delete some data on one device, the same data will be deleted on all other synced devices.
Settings

- Automatic sync - here you can turn it ON or OFF (ON is default)
- Wifi-only connection - turn ON if you want to save your precious cell data
- Show new points - when turned ON the newly synced points are shown on the map screen (not applied for the initial sync)
- Show new tracks - when turned ON the newly synced tracks/routes are shown on the map screen (not applied for the initial sync)
Troubleshooting
When there is any problem with syncing you can get information about the last sync action in the topbar menu:

- Last update - generates a log with information about the last syncing action. Use when communicating with helpdesk
Advanced options
Also available in the topbar menu.
- Compute sync plan - simulates the future syncing process
- Full download - removes all tracks, routes and points from Locus Map and downloads the synced data from the cloud
Cloud
Locus Map is synchronized with cloud storage. Its contents can be viewed in the web library and edited in the web planner at web.locusmap.app

Backup manager
We strongly recommend backing up your Locus data - settings, points, and tracks. This tool enables the definition of periodic automatic backups and triggers one-time backups.
Automatic backup
 … saves settings, points and tracks periodically to Locus/backup/auto directory and optionally to Dropbox, OneDrive or Google Drive. How to set it up:
- Enable automatic backup
- Set repetition frequency, number of stored backups and backup to cloud (optional but strongly recommended):

Backup to cloud
Automatically and regularly saves Locus settings, points, and tracks to your selected directory at Dropbox, One Drive, or Google Drive.

- First use of this feature requires login to your cloud service account
- Attached media (photos, videos…) are not backed up
- Maps and map themes are not backed up this way either
- Xiaomi devices with MIUI 12 - make sure you have “MIUI optimizations” turned ON in system settings > developer options
Manual backup
Saves a single backup file with Locus data to Locus/backup/ directory (it can be changed in settings > miscellaneous > default directories). The file name is by default its time stamp but it can be changed.

- Backup all - creates a backup of all settings, points and tracks in one package. Attached media (photos, videos, sound recordings…) are not backed up
- Backup settings only - creates the settings backup package. Useful if you use various sets of app properties.
- Restore - shows content of /Locus/backup/ directory from which you can select a backup file to restore. In the case of a file with all backups, you are prompted to select what content of the package you want to restore.
Backup sharing
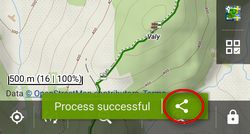
After the backup file is created you can share it - send it to Dropbox, email it, share it on social networks, etc. Just tap ![]() in the confirmation box:
in the confirmation box:
Restore
- opens the file browser with the last used drive - you can select local memory (internal or SD card), Dropbox, OneDrive or Google Drive
- find the backup directory (by default, it is /Locus/backup/) and tap a backup file to restore
- select what content of the package you want to restore:
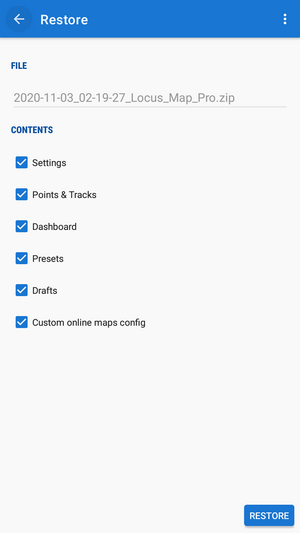
- restart the app
App data transfer
Relevant only for Android 11+ devices only.
Load app data
It searches the device storage for the app's main directory provided it is not placed in the current location. Used in case the user cancels the data transfer after an update on Locus Map version 4.5.x. and newer.
Unload app data
It moves all data of the app out of its main directory to a selected part of the storage. Used above all when reinstalling the app with the main storage in the private directory, which is usually removed by the uninstall.
Load Locus Map Classic data
Triggers the process of transferring data from the sister app's main directory to the current main directory.
Clear temporary data
Deletes temporary storage folders:
- Temporary files - deletes cache directory
- Cache of online maps - deletes all cached online map tiles
- Unneeded geocaching data - deletes all cached data of geocache points that have been removed before
- Unused attachments - deletes all data linked to previously removed points
Warning: after performing this procedure all icons will have to be re-uploaded and new map initialization files will have to be created
manual/user_guide/settings/backup_fsys.1675328884.txt.gz · Last modified: 2023/02/02 10:08 by mstupka
Except where otherwise noted, content on this wiki is licensed under the following license: CC Attribution-Share Alike 4.0 International
