Table of Contents

Route planning
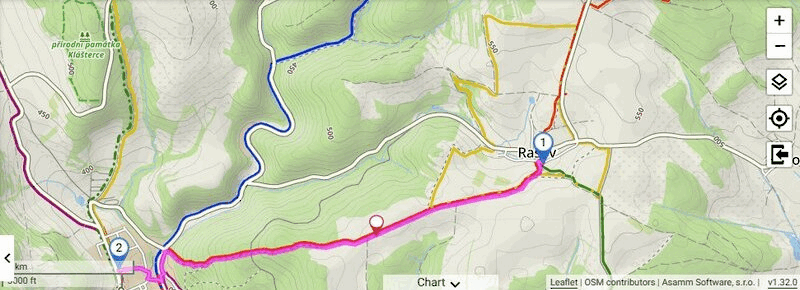
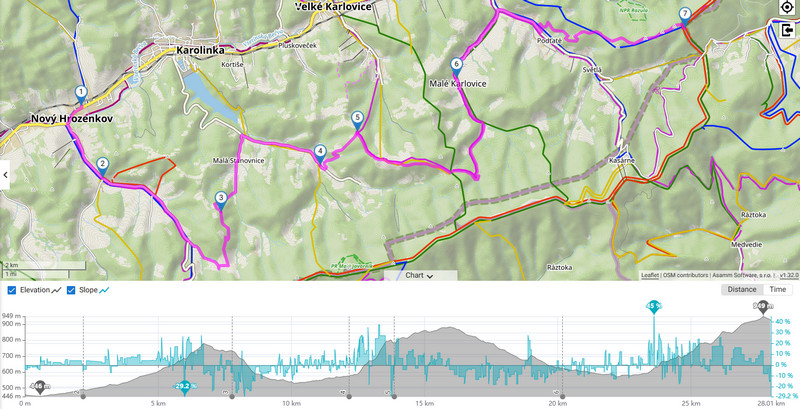
A quick sample:
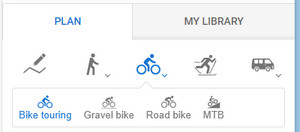
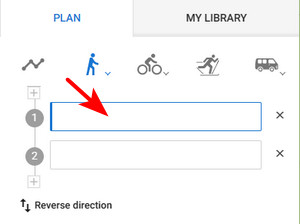
Select activity
The first step is to select an activity for which the route will be created. The planner offers two walking, three biking, two driving, one cross-country skiing and one manual drawing mode.
The manual mode is useful only when you draw the route in a free terrain or when the routing data for a particular area is missing:
You can select a different activity or transport for a new route segment before adding another route point.
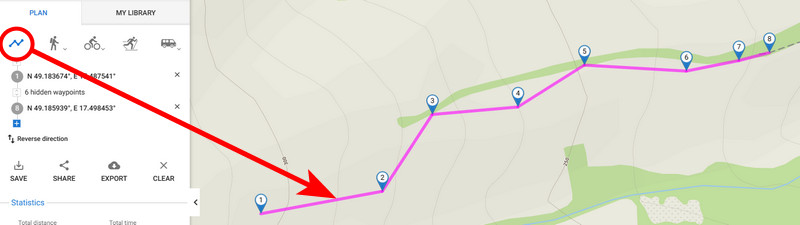
Add route points
The route is created the same way as in the app. The simplest way is to click the route points directly on the map on roads and paths. There are two ways how to start a route plan:
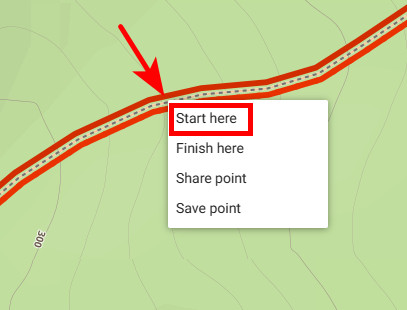
Route start
- Right-click + Start here - the first click must be done with the right mouse button and selecting the “Start here” option:
- Click on the first route point box:
By both ways the planner switches into the drawing mode and you can add other route points by left-clicking. By shifting the cursor above the route line between the points a new point emerges and by dragging it you can change the route progress:
 You can move any of the route points at any time and the route always reroutes accordingly.
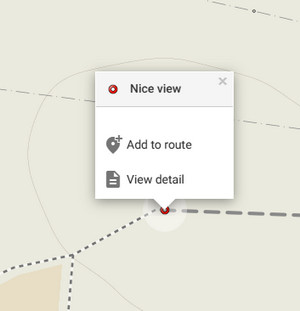
Adding LoPoints and other points
You can also add LoPoints to your route. Shift the cursor on the LoPoint, and a popup emerges. Click on Add to route.
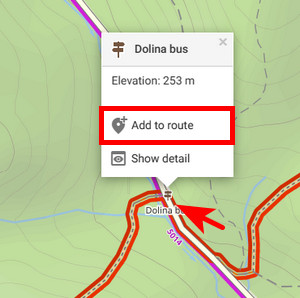
The LoPoint is added at the end of the route.
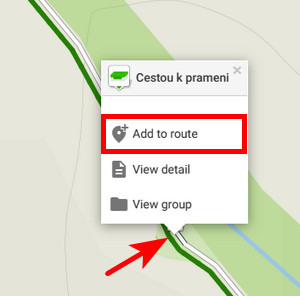
This way you can add also your user points like geocaches or search results to the route:
Adding points inside the route
The route points are lined up in an itinerary displayed on the panel on the left. Here you can place the route points at the beginning or inside the route.
- click + in between the route points in the itinerary where you want to insert a new point - a new empty mid-point is created:

- click on the place on the map or on a LoPoint which you want to insert:

You can also start typing inside the point box and start searching the point.
Changing order, deleting, reverse direction
You can change the order of the route points by click-and-drawing them up or down the line (1), delete them (2), or reverse the course of the whole route (3):
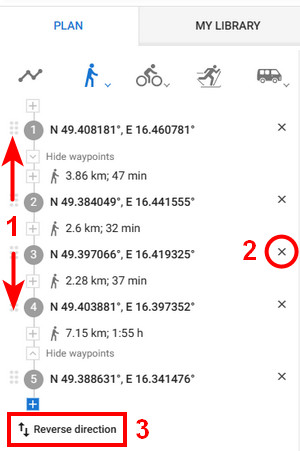
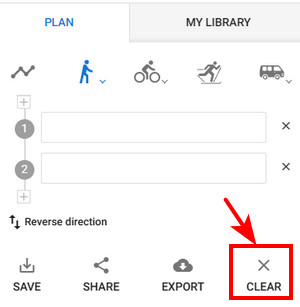
To delete the whole route from the planner, tap Clear:
Changing activity in the route segments
You can fine-tune the route progress by selecting a different activity or means of transport for each route segment.
- click the symbol of the segment activity in the itinerary. A selection of activities and transport opens up.:
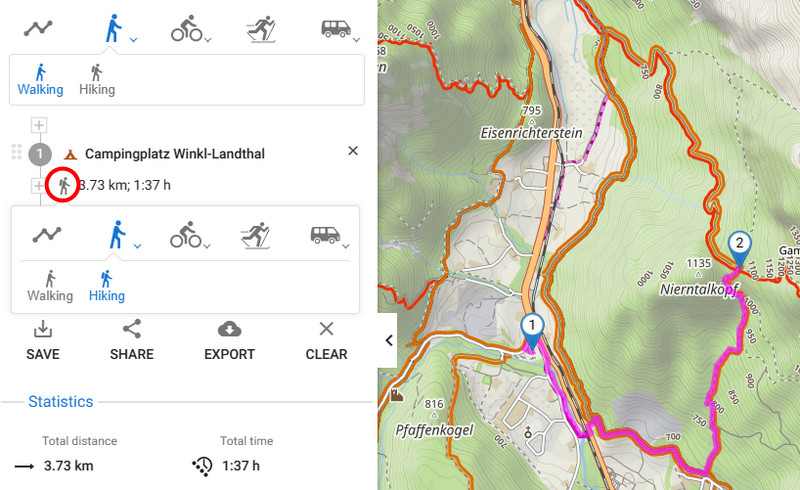
- select a different activity
- the route re-routes accordingly:

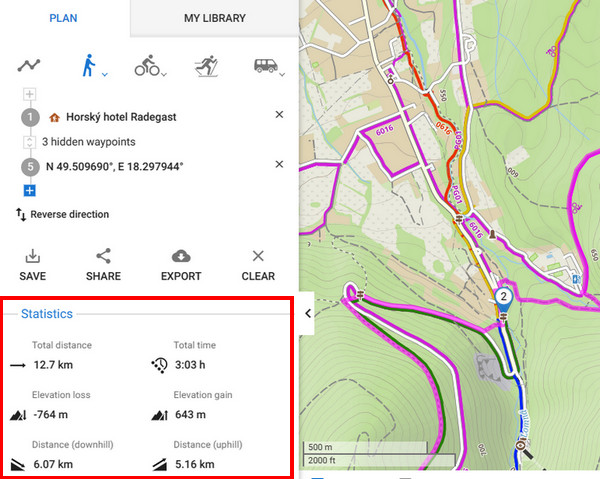
Route stats
Statistics of the route like distance, estimated time or elevation gain are displayed in the left panel under the itinerary.
Elevation chart
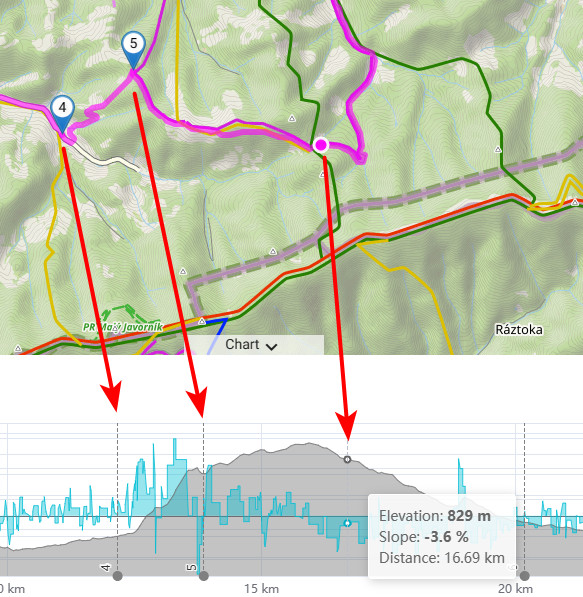
The elevation and slope progress of the route is displayed on a chart:
 The chart also displays min/max elevation and slope, waypoints and elevation/slope/distance at the position of the cursor:
 You can change the X-axis parameter - distance or estimated time:

Export
You can export the route as a GPX file that can be used in any navigation app or service. Click Export and then Download as GPX:
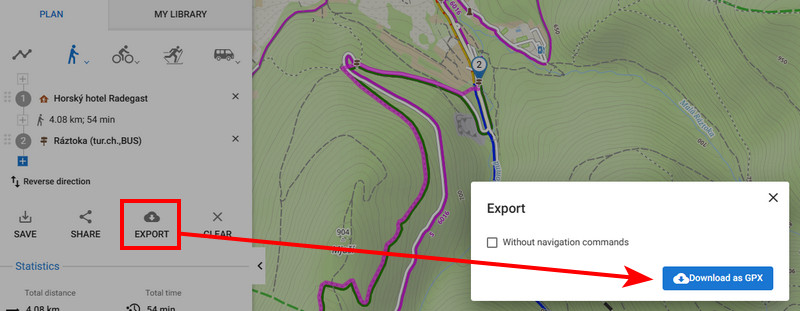
If you don't want to keep the voice navigation commands in the route file, check the option Without navigation commands.
Saving
Available with Premium Gold
You can save the planned route into your library synced with the Locus Map app:
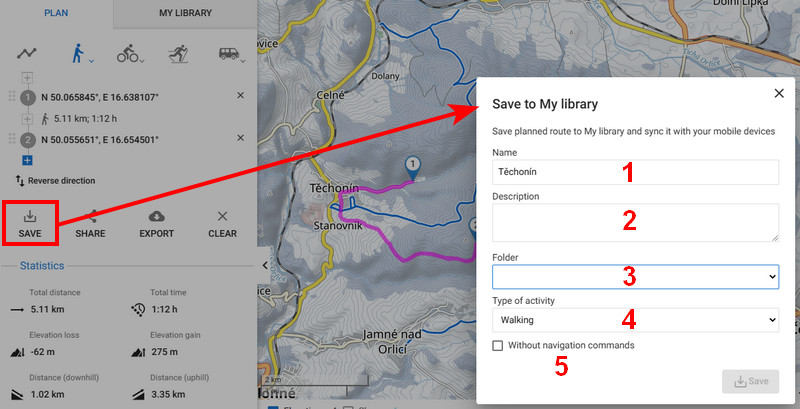
- (1) edit the route name (optionally), default is the name of the nearest settlement or start/stop destinations
- (2) you can add description (optionally)
- (3) select folder into which the route will be saved (mandatory)
- (4) change the type of activity (optionally). The default is the activity you selected during planning.
- (5) if you don't want to include the navigation commands check Without navigation commands.
- click Save
The route is saved into the selected folder in your library and synced with the app after a while.
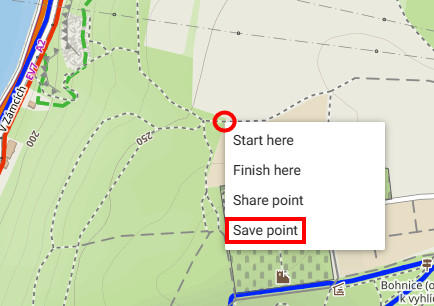
Creating a single point
If you want to add your own point that is out of the route:
- right-click the map on the spot where you want to place the point
- click Save point
- fill the name and the folder into which you want to save the point (others are optional):
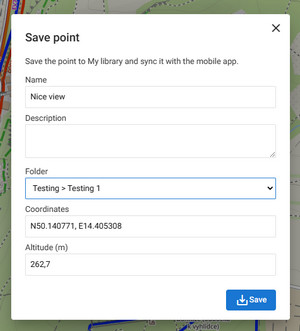
- the point is saved into the library and adopts the icon of its folder: