

Translated from English by gtranslate.io
This is an old revision of the document!
 ====== About Tracks & Routes======
Locus Map can record tracks and import already recorded tracks from other sources.
Actually Locus Map can transform a previously recorded track into a route and navigate along it.
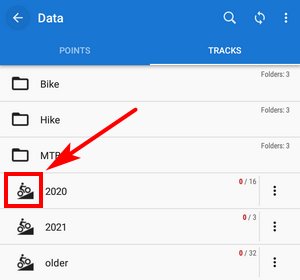
 next to the track(s) you want to display on the map. It changes into
  and highlights:
 . All highlighted tracks are displayed on the map. in the bottom bar and select from the options:
To hide track/routes from the map screen, revert the procedures described above. Plus there are a few more options:


When you tap on a track/route in the track manager folder, the detail panel emerges. The upper part is filled with a map preview of the track. Tapping the centering button opens the map screen with the track aligned in the center:

When you tap a track on the map, the detail panel slides up from the bottom:

The upper part contains the track name (1), date of creation (2), and basic stats of the track/route (3). Tapping the arrow button on the right maximizes the stats screen:

The elevation chart (4) displays the position of the tapped trackpoint. Maximizing button unfolds the chart to the more detailed version:

The trackpoint is highlighted there too, including related graph values (here with elevation and slope %).
The bottom toolbar:
 graph settings - here you can set X-axis parameter (distance/time) and two parameters for the Y-axis (altitude, slope, speed, heart rate and cadence - if appropriate sensors are connected)
 returns the whole graph into the box when it is zoomed out
 if you tap on the chart once more, this shows the trackpoint on the map
More details emerge when you slide the track detail panel further up:
Available only with Premium Gold
The way types and surfaces along the route are displayed only if the route is planned in the Locus Map route planner using LoRouter:

When you tap the way type or surface graph the description is shown.  shows the way types/surfaces along the route in %:

The main waypoints along the route are displayed as icons:

To display a list of all of them including navigation waypoints, maximize the box with the arrow button:

Each waypoint can be edited or deleted ( menu). To add more waypoints, copy or move them, tap the red + button:

When the track is recorded and contains time data, here you can see the best interval on the track:

Maximizing the box shows all intervals along the track. The track length can be set in the topbar:

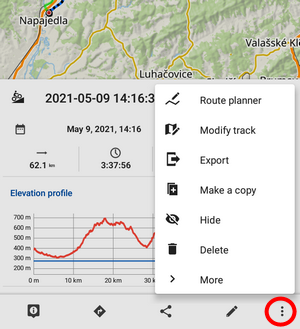
The toolbar at the bottom of the track detail panel offers a wide range of tools divided into categories:
 - trackpoint detail screen
 - sharing methods
 - editing info and style - tool menu
Each track or route consists of track- or route-points. Tapping the icon in the corner opens the detail screen with information about the particular point:

At first the panel is slid up only partially, showing the distance to the trackpoint and its elevation. The distance is a combination of the distance to the closest point of the track and then along the track to the selected trackpoint. Further sliding up shows full detail:

 - back to the track detail
  - creates a new point on the track point position
 - starts navigation or guidance to the track point
 - opens tools of related add-ons (e.g. nearest geocaches) - options of sharing the track point
Another bottom bar menu offers track/route sharing options:


Here you can edit the name, description, activity type, folder and the line style of the track/route:


Reverse the route only for offroad use! Navigation commands on a reversed route don't reflect the traffic situation accurately.
The second level of the tool menu:


To make a copy of the track part, to export it, compute the area covered by it or calculate its estimated travel time, select from the tool menu:


