Table of Contents

Guidance
Guidance to a Point
Off-road, beeline guiding to a selected place, independent on road network. Used especially for orientation in free terrain.
Typically useful for finding geocaches or directing towards user's points of interest and LoPoints (remote viewpoint, waterfall etc.):
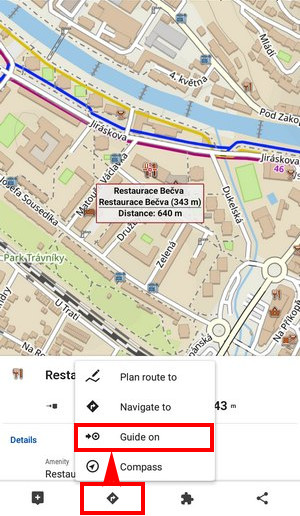
How to guide? Select the target and start guiding to it from its action menu:
Target selection
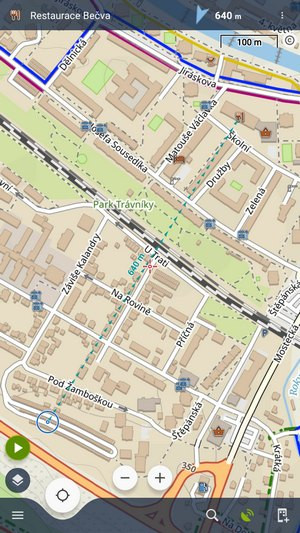
Directly on map
- tap a LoPoint, a user point or any other point on the map or hold your finger on the place on map where you want to be guided to
- tap the navigation button in the bottom bar and select Guide on
Other location options
When you need to define your target location another way, use location selector:
- tap Menu > All features > Navigation > Guide to

- select method of defining target of your route:

Points from the point manager
Use e.g. in case you want to be guided to some geocache from your database:
- select the point from Point manager
- tap it to display the point detail screen
- tap navigation menu button from the bottom panel and select Guide on
Controlling
Point guidance panel
 It displays information about the point, its distance and direction. In case of guidance to a geocache there are also other facts like the cache type, difficulty and terrain. Tapping the panel displays the point detail screen.
Panel menu
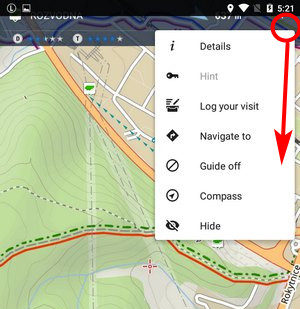
- Details - opens screen with the point details
- Hint - in case of guidance to a geocache
- Load all waypoints - in case of guidance to a geocache with more waypoints
- Navigate to - switches to turn-by-turn navigation and calculates a route to the target
- Guide Off - stops guidance
- Compass - switches into compass view
- Hide - makes the point invisible on map
Target notifications
Locus can notify you of coming target several ways:
- once in defined distance from the point of guidance
- repeatedly after you reach defined distance
- changes frequency of alerts in dependance on your distance from the target (the faster the closer you are)
Settings
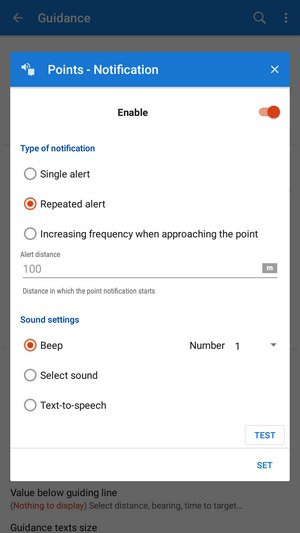
- go to Menu > Settings > Guidance > Notification
- Switch Notification ON
- Select notification mode - single alert, repeated or increased frequency alert
- Set the distance you want to be alerted at (or distance interval between repeated notifications).
 First two options have further settings:
- Settings of sound
- Disable - all sounds are disabled, notification is made by the device screen and vibrator only
- Beep - it is possible to set number of beeps (1-10)
- Select sound - select from sounds stored in your device memory
- Text-To-Speech - voice notification informing about distance and direction of the point. Tap Play to check your sound settings.
- Settings of vibration - visible only when the device is equipped by a vibrator (mainly mobile phones)
- Disable - the device does not vibrate on notifications
- Pattern - sets notification vibrating pattern, using three symbols: '.' for 200 miliseconds vibration, '-' for 500 miliseconds vibration and ' ' (space) for 500 miliseconds of silence. Tap Play to check your vibration settings.
Automatic zooming
Locus can zoom the map automatically according to the distance from the point you are guided to - the closer the target is the bigger zoom is displayed so both your position and the target are visible on the map screen:
The option can be switched on in Settings > Controlling > Map screen > Zoom according to speed.
At first, the function zooms according to your current speed, beginning at 2000 m from the target it switches to the distance-based zooming mode. Applicable only for guidance to a point (not along a route).
Automatic screen on
To save your battery energy you can set the automatic screen turning on. The screen lights up simultaneously with the sound notification.
You can set it up in Settings > Controlling > Display > Screen on/off control:
Guidance Along a Route
In other words guidance to a chain of route points:

You are guided to the first point of the route, then to the second, etc. It is useful e.g. for sailing, sea-kayaking, flying, or cross-country hiking when there are no roads for turn-by-turn navigation.
Route selection
- select a route on the map or in the track/route manager and tap it to display its detail panel >>
- tap
 navigation button in the bottom bar and select Guidance
Locus Map automatically generates simplified navigation commands along the route in places of the most remarkable direction changes.
Reverse direction
To be navigated in reverse direction of the route, check “Guide reversely”:
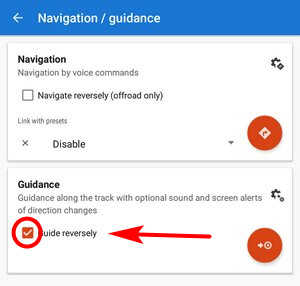
Guiding commands on a reversed route may not reflect traffic situations accurately. Recommended for offroad use only!
Controlling
Route guidance panel
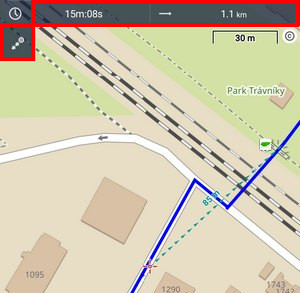 Appears when guidance is started. Consists of three sections:
 Action menu
- two information fields
Action menu

- information - displays screen with detailed info on the route
- nearest point - starts guidance to the nearest point of the route (it does not have to be the starting point)
- next point - starts guidance to the next nearest routepoint
- guide off - aborts guidance
Information fields
Both can be configured. Tapping them unfolds a menu of features to display:

- Distance to target (default)
- Time to target - estimated time calculated upon your average speed
- Time of arrival - estimated arrival time calculated upon your average speed
- Name of next waypoint - in case the waypoints are named
- Distance to next waypoint
- Time to next waypoint - estimated time calculated according to average speed
- Time - device clock
- Altitude - current altitude of the user, calculated from GPS or the device barometer
- Speed
Notifications of turns
Locus Map can notify you of direction changes on guided route. The notifications are rendered automatically based on the route shape and do not reflect intersections.
- go to Menu > Settings > Guidance > Notification of next turn:
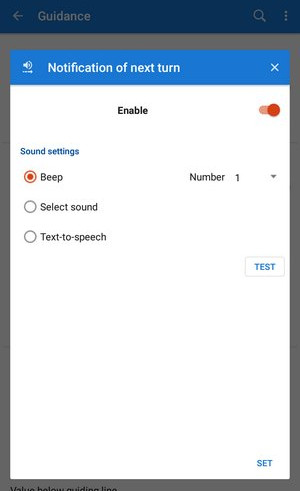
- select type of alert - beep(s), custom sounds or Text-To-speech. TTS is very simple, if you need more detailed voice commands, use Navigation.
Set "out of route" notification
Locus Map can notify you when you leave guided route. Just set up the alert distance and type of alert:
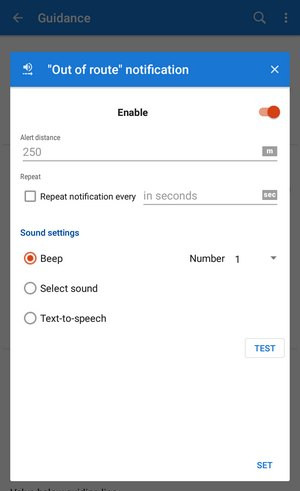
- go to Menu > Settings > Guidance > “Out of route” notification
- set alert distance and (optionally) repetition period
- select type of alert. TTS announces distance and direction of the nearest point of the route.
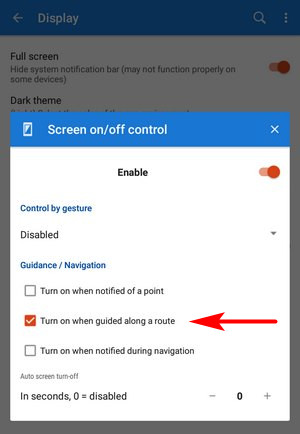
Automatic screen on
To save your battery energy you can set automatic screen switching on. The screen lights up simultaneously with the sound notification of the route turns.
You can set it up in Settings > Controlling > Display > Screen on/off control:
Other settings
Guidance in Locus Map can be further configured in Menu > Settings > Guidance.