Table of Contents

Points Management
User points (created or imported) are managed in the Library. Usually, it can be accessed from the main menu:
Displaying points on the map
One by one
- open a folder containing points in the Library
- tap
 next to the point(s) you want to display on the map. It changes into
  and highlights:
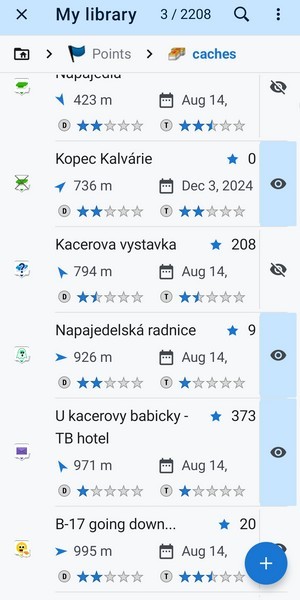 . All highlighted points are displayed on the map.
From a point detail
When you have a point detail in the Library open, tap the eye button in the top right corner:

The whole folder
- tap the eye button next to the folder title and select display all:

- to deactivate all points in the folder, select hide all
Hiding
To hide points from the map screen, revert the procedures described above. Plus, there are a few more options:
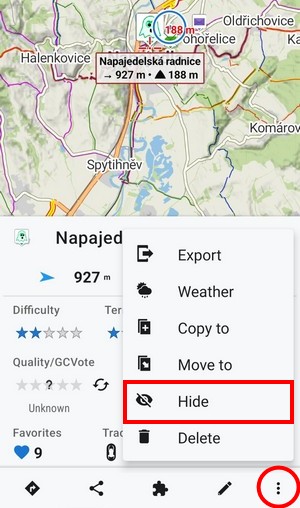
- to hide a single point, tap it on the map and select hide from the bottom menu:
Sorting

- open the folder containing points
- select Sort by from the Library menu. At the first level, you can sort the points by name, distance from the cursor location, data/time of creation, and date/time of update:

- in the next level you can sort points by geocaching criteria:

Filtering

- open the folder containing points
- select Filter from the Library menu. At the basic level, you can filter the points by the name and date:

- at the points level, you can filter points by icons, max. distance and geocaching parameters:

- for geocaching, there is a wide range of filtering parameters available:

- tap FILTER to apply the filter. Tap CLEAR to deactivate it.
Search

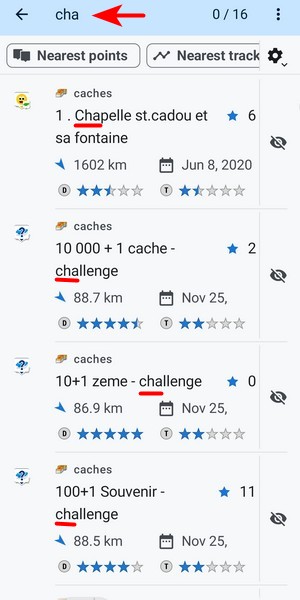
- by default, you can search your points by fulltext:
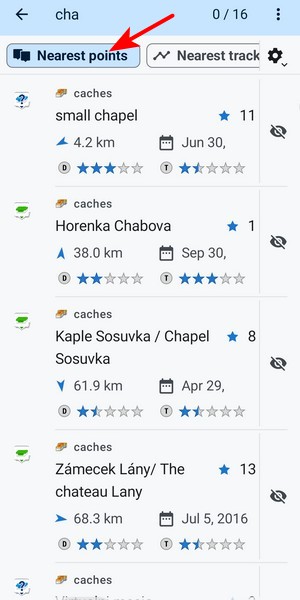
- you can also modify the search by the distance:
To search across all nested subfolders, check it in the search options. There are also options to search the folder names and point descriptions:

Bulk operations
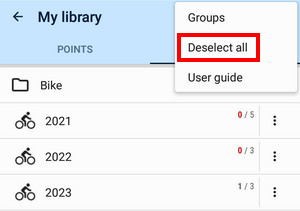
If you need to manage one or more points at once, switch the Library into the select mode:

You can also turn on the select mode by long-pressing one of the points in the folder.
The tools are available in the menu at the bottom right:

Copying
- check the point/s that you want to copy
- select Copy to from the tool menu
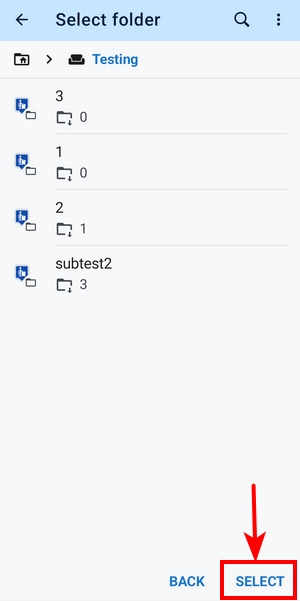
- browse the Library and select the target folder
- tap SELECT
Moving
- check the point/s that you want to move
- select Move to from the tool menu
- browse the Library and select the target folder
- tap SELECT
Export
- check the point/s that you want to export
- select Export from the tool menu
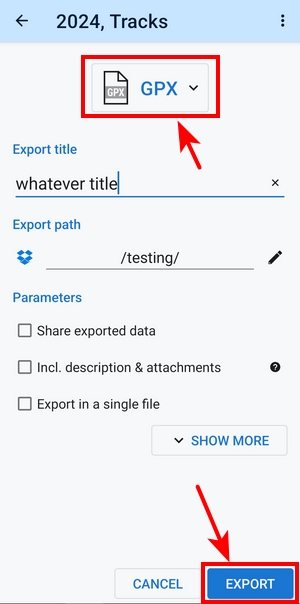
- select the export file format, edit the title, path and other parameters if needed
- tap EXPORT
Deleting
- check the point/s that you want to delete
- select Delete from the tool menu
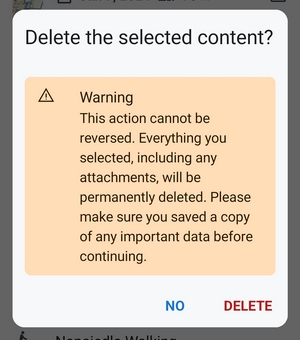
- read the warning - deleting is irreversible and also removes the item/s from all synchronized devices and the web Library
- tap DELETE
Updating elevation
It may happen that newly imported points don't have elevation. Use this feature to add elevation value to one or multiple points.
- check the points for which you want to update or add elevation
- choose Update elevation from the thool menu
- elevation is updated for the selected points
Changing icons
If you want to change or unify the icon of multiple points, use this option.
- check the points for which you want to change or unify the icon
- choose Change icons from the tool menu
- select the icon from the list. There are recently used, default point icons, Garmin icons and external icons (if you added some custom ones):

Point label
Appears when you move the map cursor across the point icon on map:
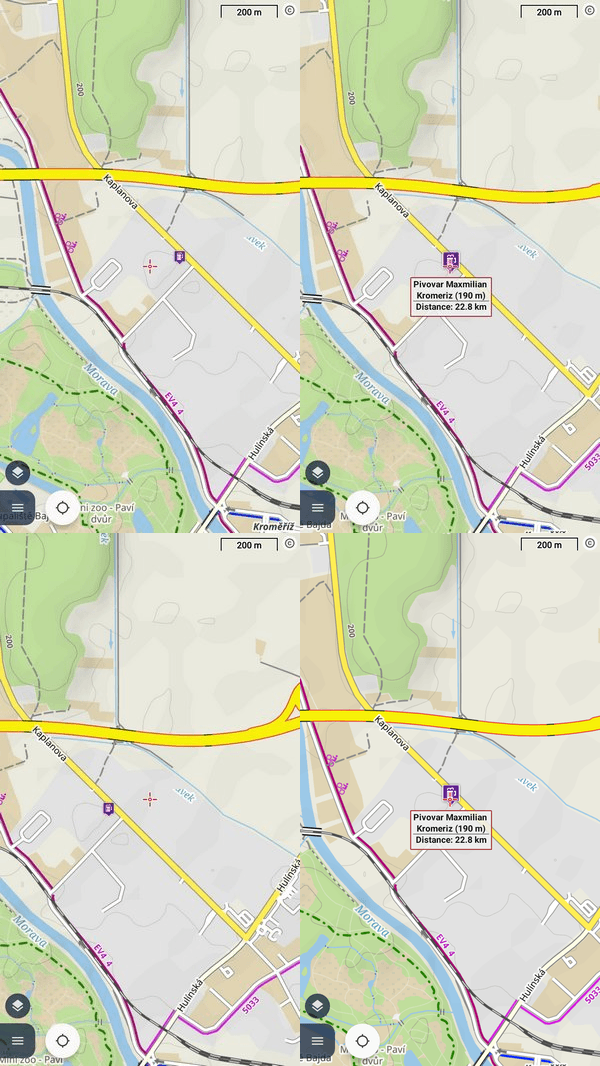
It contains the point name, distance from the current position, elevation (if relevant data are available) and a thumbnail of an attached image (if there is any).
Tapping the point icon on the map slides up the Point detail panel:
Point detail panel
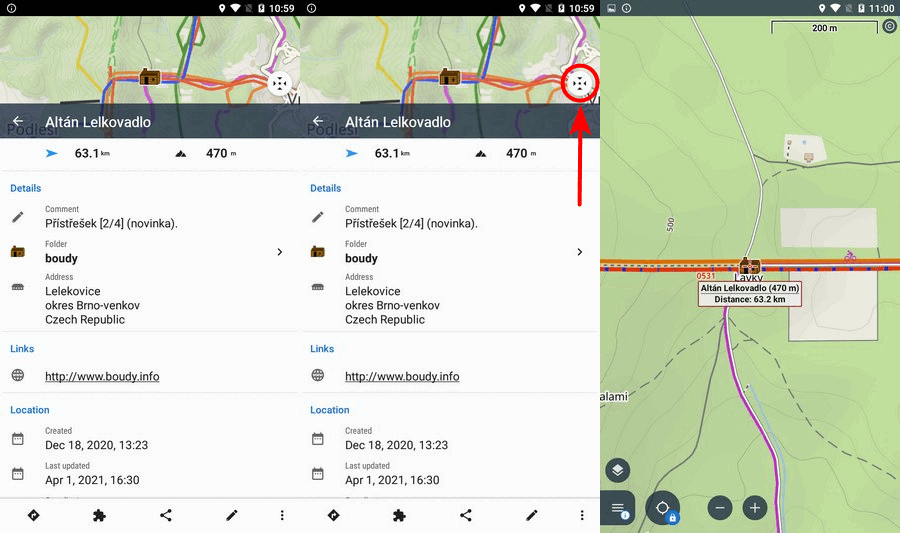
When you tap a point in a Library folder, a screen with detailed information about the point emerges. Its upper part is filled by a map preview with the point. Tap the centering button to place the point in the middle of the main map screen:
When you tap a point on the main map screen, a panel with detailed info about the point slides up from the bottom:
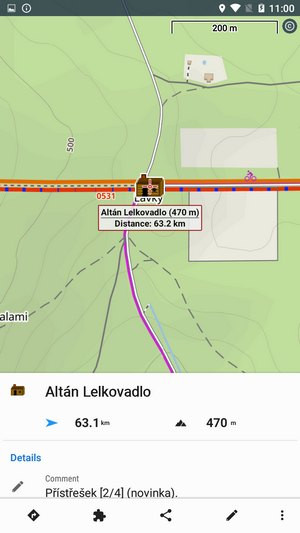
If you shift the map out of the point's location, Locus shows a pointer on the location of the selected point so that you always know where the point is. By tapping the pointer, you center the point back on the screen:
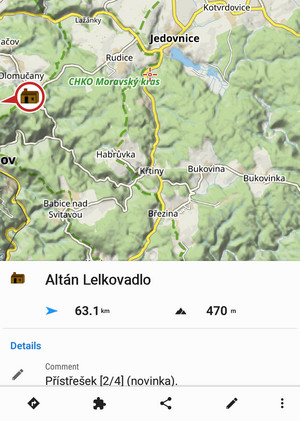
Basics, description and other info
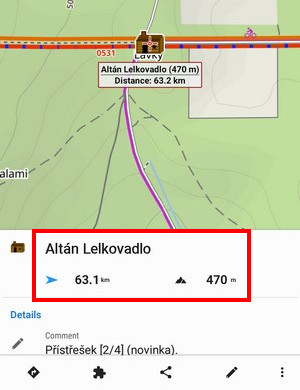
- name, direction, distance and elevation are visible right after the panel slide up:
More information emerges when you slide the panel a bit more up: - Description, folder, links, location… are lined up below the main info:
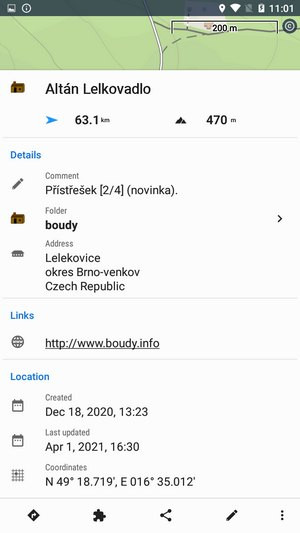
Folder - tapping opens the folder in the Library. Coordinates - long-press copies the coordinates to the clipboard
Tools
The bar with tools is placed at the bottom of the panel. It contains several groups of tools:
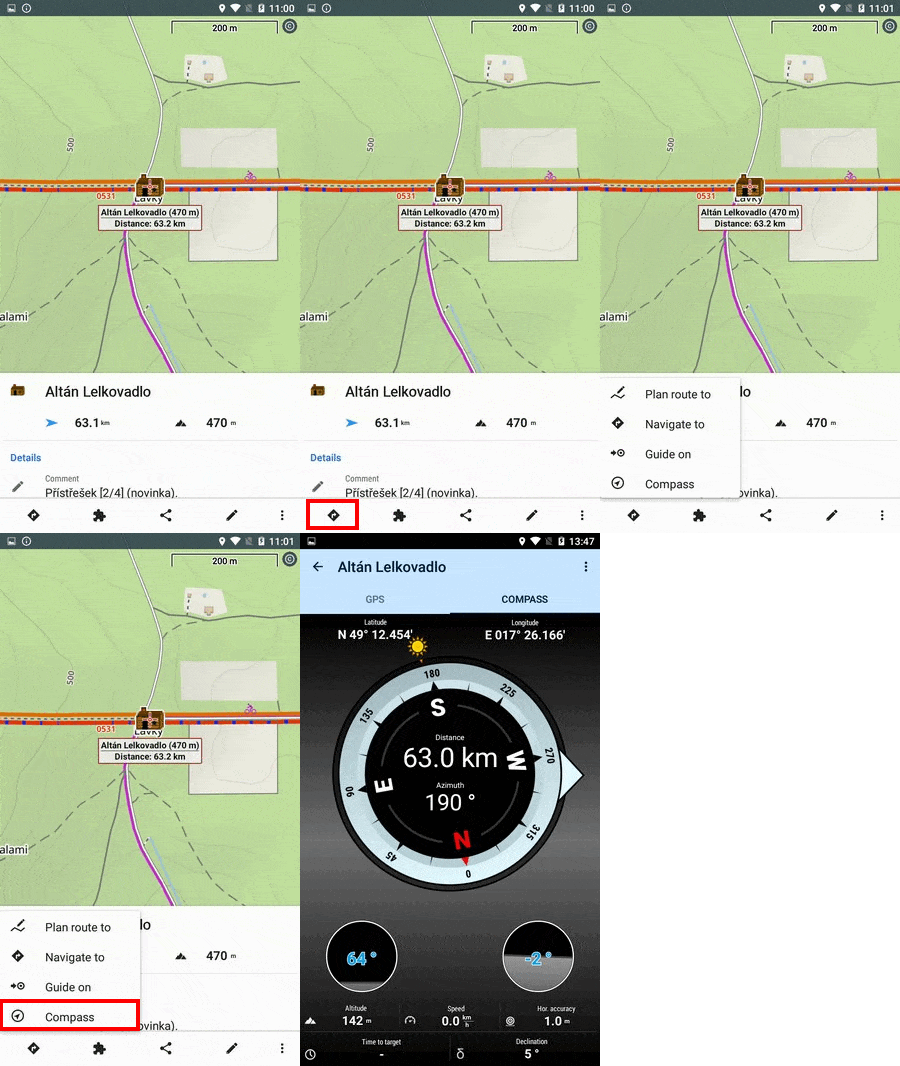
Navigation options
- Plan route to - opens the route planner and adds the point as the target.
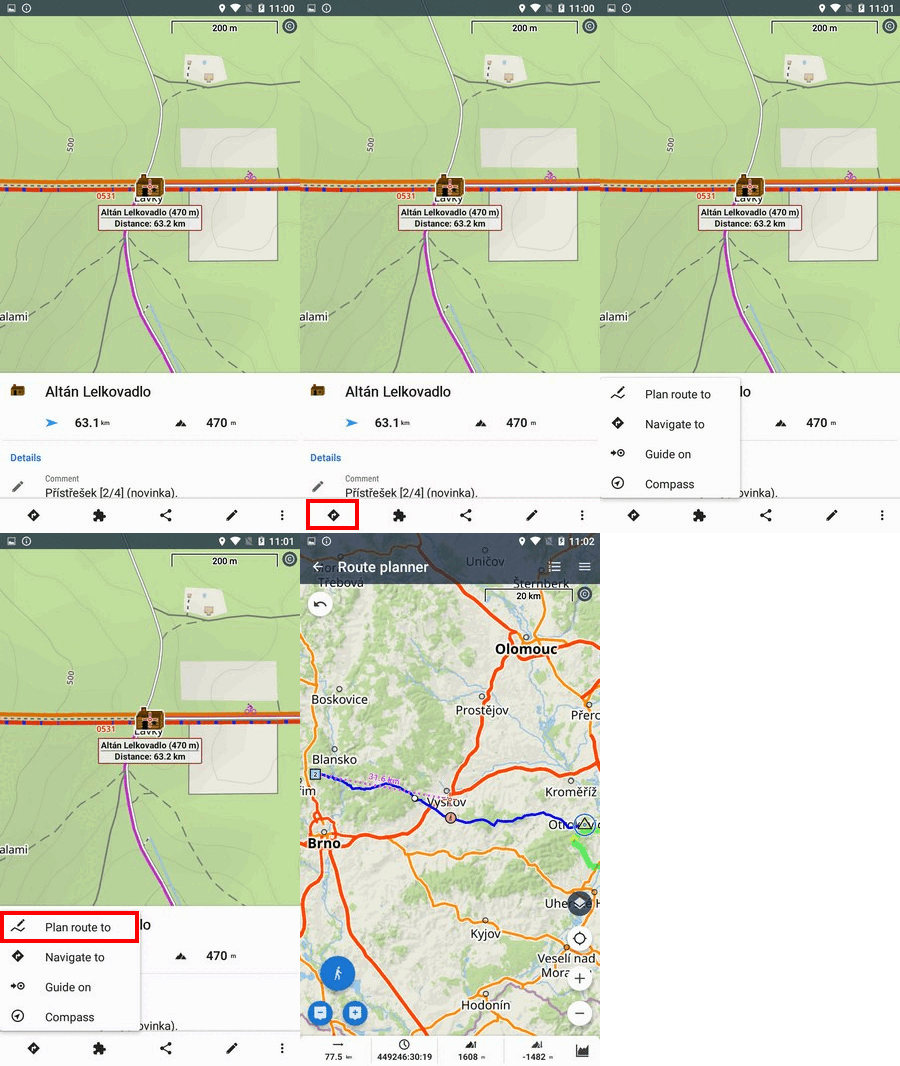 You can go on planning the route - change profiles, add more points etc.
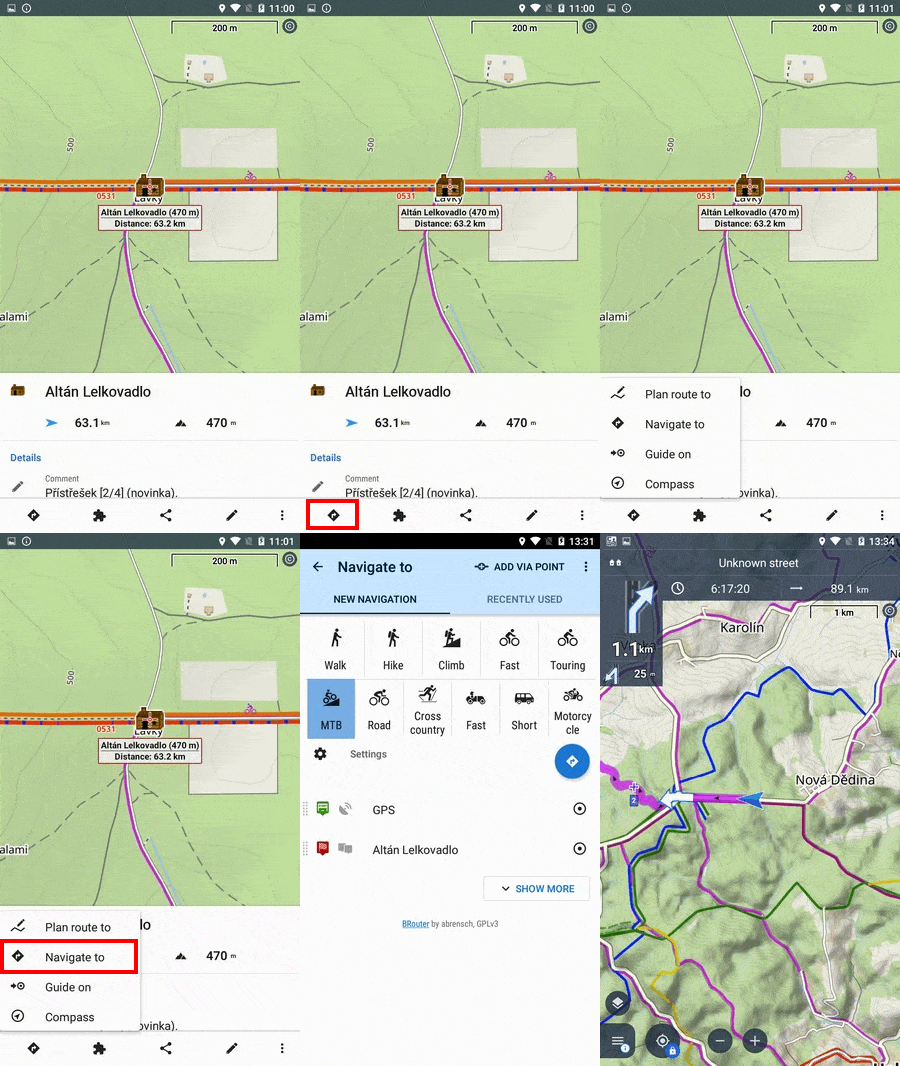
 - Navigate to - opens the route planner and generates a route to the point from your location. Tap the button in the topbar to start navigation to the point:
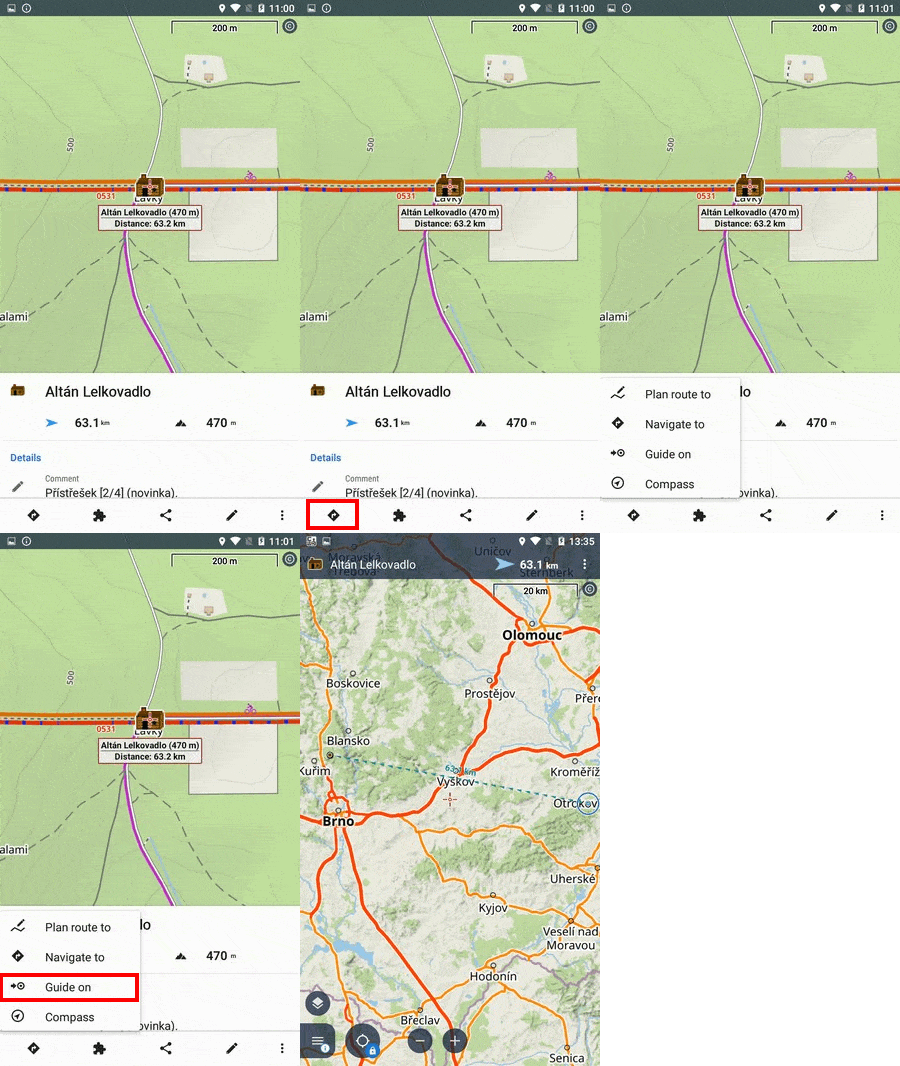
- Guide on - starts guidance to the point in a beeline direction (recommended when the point is placed off-road):
- Street View - opens Google Street View app and shows the point in it (if available)
- Navigation apps - opens a list of installed applications that are able to navigate to the point (Google Maps, Komoot, Sygic, etc.)
Add-on options
The contents of this group depend on the installed add-ons. The most common options regard the Geocaching4Locus add-on.
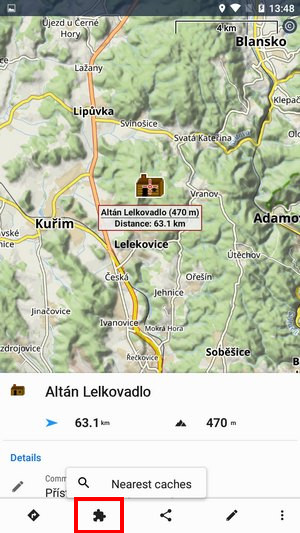
Sharing options
Opens a selection of point sharing options which are the same as for the map cursor (except the basic geocache info sharing):
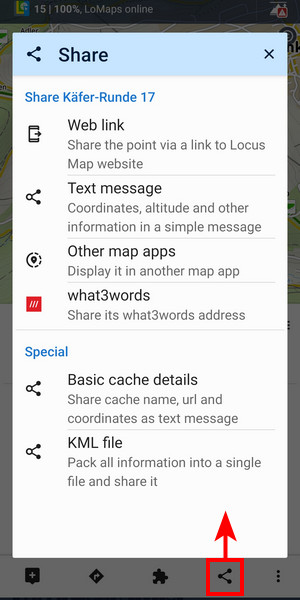
More about particular sharing options HERE >>
Editing options
Opens a dialog screen where you can edit any information about the point - its icon, name, folder, description… even its location:
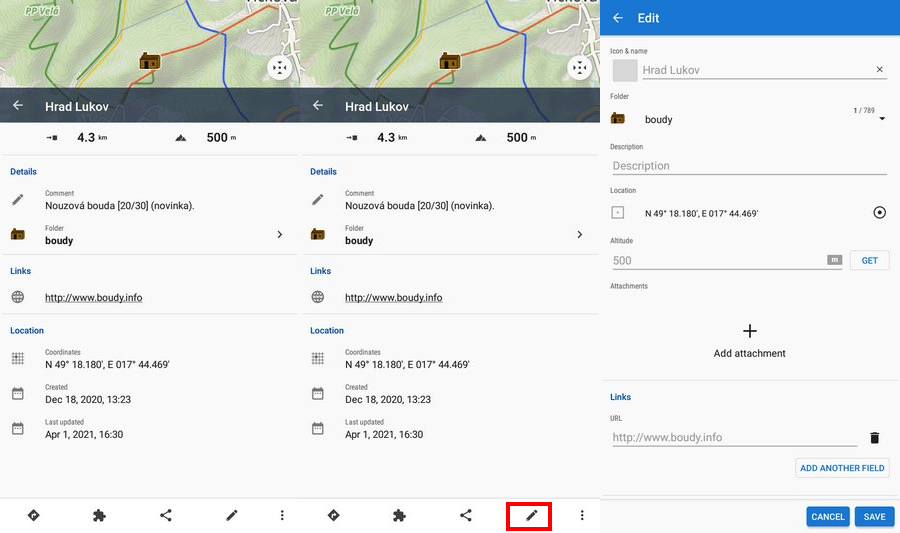
- Altitude - if this parameter is empty tap the GET button to acquire elevation from the offline data (Premium only)
Attachments
Contains a list of attached files. To add some, tap the “+”. List of adding options emerges:
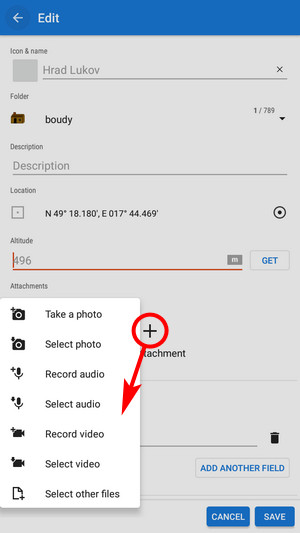
- Take a photo - takes a picture with your phone or tablet camera
- Select photo - selects a photo in your phone memory - the attached photo can be used as the point icon - tap the menu next to the photo and select Set as icon
- Record audio - makes a voice recording by the phone or tablet microphone
- select audio - attaches an audio file from your phone memory
- Record video - makes a video recording by the phone/tablet camera
- Select video - attaches a video from your phone memory
- Select other files - selects other files in your phone memory to attach to the point
Without Premium, the number of attachments for one point is limited to two.
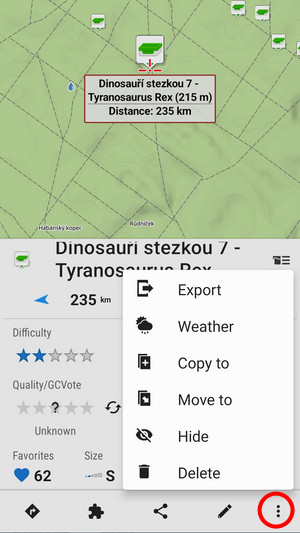
More options
…offers the same editing/copying etc. options as the folder tool menu, plus local weather forecast:
