Translated from English by gtranslate.io
Sidebar
manual:user_guide:webplanner:planning
This is an old revision of the document!
Table of Contents

Route planning
A quick sample:
<html><iframe width=“800” height=“600” src=“https://www.youtube.com/embed/q9xQgnIADe8?controls=1” title=“YouTube video player” frameborder=“0” allow=“accelerometer; autoplay; clipboard-write; encrypted-media; gyroscope; picture-in-picture; web-share” allowfullscreen></iframe></html>
Select activity
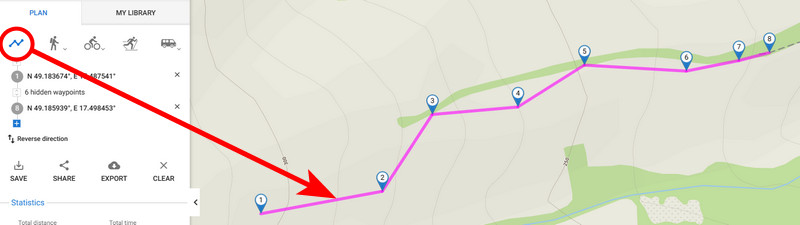
The first step is to select an activity for which the route will be created. The planner offers two walking, three biking, two driving, one cross-country skiing and one manual drawing mode.

The manual mode is useful only when you draw the route in a free terrain or when the routing data for a particular area is missing:
Add route points
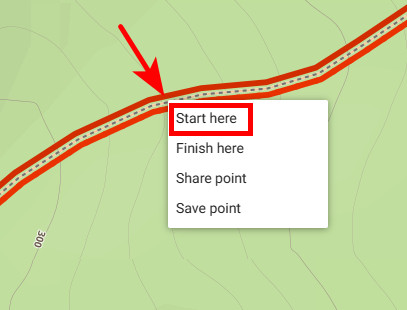
The route is created the same way as in the app. The simplest way is to click the route points directly on the map on roads and paths.
The first click must be done with the right mouse button and selecting the “Start here” option:
 This way the planner switches into the drawing mode and you can add other route points by left-clicking. By shifting the cursor above the route line between the points a new point emerges and by dragging it you can change the route progress:
 You can move any of the route points at any time and the route always reroutes accordingly.
Adding LoPoints and other points
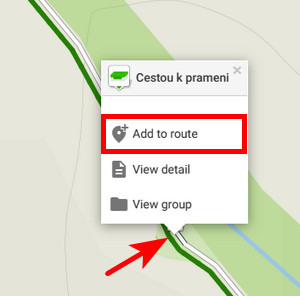
You can also add LoPoints to your route. Shift the cursor on the LoPoint, and a popup emerges. Click on Add to route.
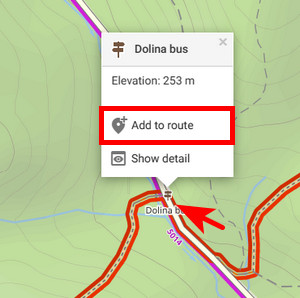
This way you can add also your user points like geocaches or search results to the route:
Changing order, deleting, reverse direction
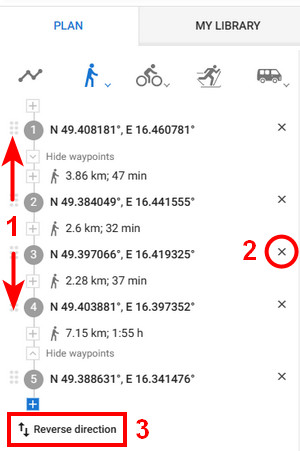
The route points are lined up in an itinerary displayed on the panel on the left. You can change their order by click-and-drawing them up or down the line (1), delete them (2), or reverse the course of the whole route (3):
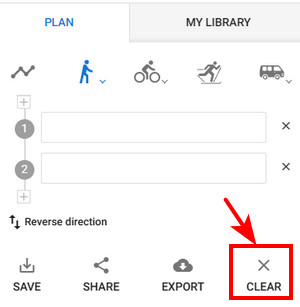
To delete the whole route from the planner, tap Clear:
Route stats
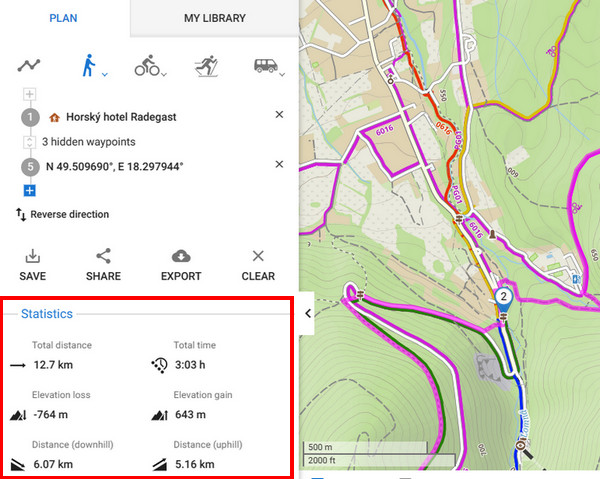
Statistics of the route like distance, estimated time or elevation gain are displayed in the left panel under the itinerary.
Elevation chart
The elevation and slope progress of the route is displayed on a chart:
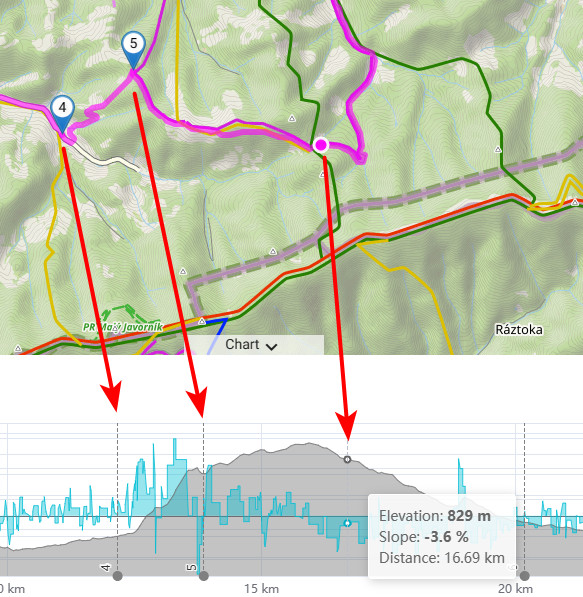
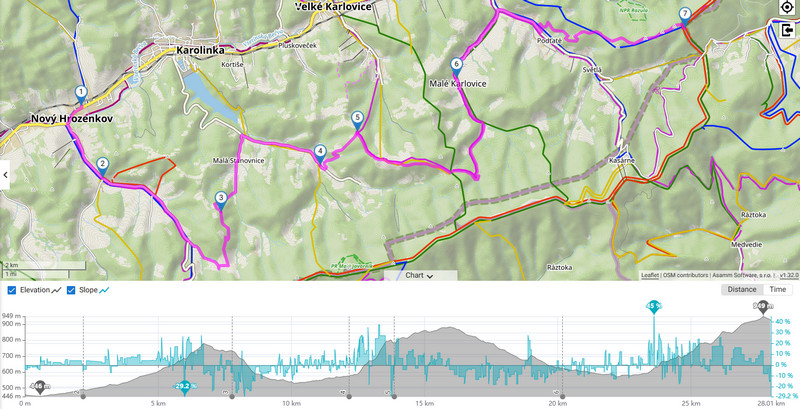 The chart also displays min/max elevation and slope, waypoints and elevation/slope/distance at the position of the cursor:
 You can change the X-axis parameter - distance or estimated time:

manual/user_guide/webplanner/planning.1675696028.txt.gz · Last modified: by mstupka
Except where otherwise noted, content on this wiki is licensed under the following license: CC Attribution-Share Alike 4.0 International
