Translated from English by gtranslate.io
Sidebar
manual:user_guide:geocaching:gc_in_locus
This is an old revision of the document!
Table of Contents

Geocaching in Locus Map
page in maintenance
About
- Locus Map handles geocaches as a category of points - each has its name, coordinates, description plus further specific parameters like cache code, difficulty, terrain, size etc.
- Geocaches can use all the features related to points - you can manage them (store them in folders, sort them, filter, copy…), you can share them, you can navigate to them, guide to them on the map or by the compass, or include them in your planned routes
- Then there is a wide range of tools and functions for geocachers and makes hunting for geocaches easier and more fun.
Import
- Geocaches must be imported to Locus Map first. The import is processed by Locus add-ons or cooperating applications. See more details in Import of Geocaches >>.
Geocache detail
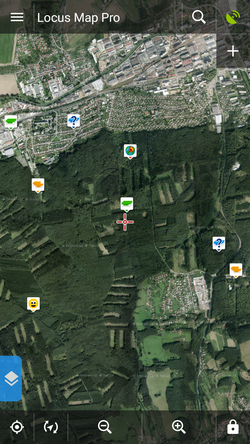
By default, the imported geocaches are displayed on the map right away. After tapping a geocache on the map a panel with its detailed info slides up.
 The panel is similar to that of a common point but there is quite a lot of additional information:
- Difficulty- 5-star scale of difficulty to find the geocache
- Terrain - 5-star scale of terrain difficulty
- Quality/GCVote - user rating of the geocache
- Logs - icons of the last five geocache logs - the category can be maximized to a detached box with details
- Favorites - number of users who marked the geocache as their favorite
- Size - a 5-grade scale of the geocache box size
- Trackables - number of trackables dropped here (displayed only to Premium members, others see TR 0) - the category can be maximized to a detached box with details
- Waypoints - number of waypoints connected to the geocache - the category can be maximized to a detached box with details
When you scroll the panel up, more information appears:
- Attributes - various preferences of the geocache according to Geocaching.com.
- Listing - an excerpt of the geocache listing that can be displayed as a whole. Listing is visible only to Geocaching Premium members
- Code - a unique GC code of the geocache. Tapping it displays a menu box:
- Type - type according to GC categories - traditional, multi, mystery…
![]() more options menu contains:
more options menu contains:
 Hint button, opening a box with tools menu:


You can encrypt/decrypt the hint, copy it to clipboard or let it translate by any installed translating app/service Load all waypoints - appears only when the cache contains waypoints - it displays them all on map
 Log button, opening a Log side panel menu:

Log your visit - you can log your visit online to www.geocaching.com. Upload field note - uploads a previously created offline log to www.geocaching.com. Store offline - starts the Logs manager to create an offline log for future uploading- the rest is common for all kinds of points - Navigate to, Guide on, Compass and Hide (removes the point from map)
Managing geocaches
Folders
Looks and offers the same controls as an ordinary point folder screen except a few more options:
Sorting menu
Contains a rich choice of geocache parameters to sort by:


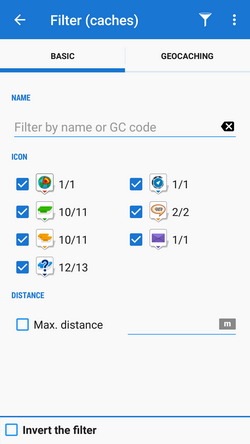
Filtering menu
Basic GC filtering - you can filter geocaches by name, GC code, icon (type) and distance:
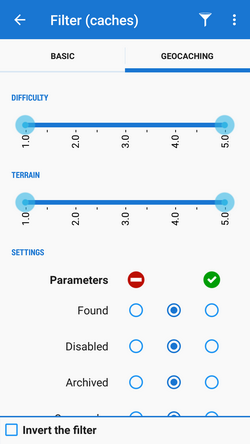
Special filtering offers setting of difficulty, terrain and a lot other parameters:
You can set displaying of the filtered results on map:

Tools menu
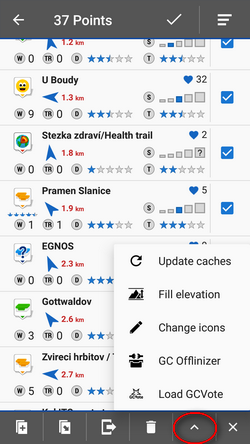 Besides common functions like Copy/Move/Export/Delete or Fill elevation contains several GC-specific features:
 Update caches - updates downloaded caches listings, logs etc. The button is present only if the Geocaching4Locus addon is installed.
 GC Offlinizer - downloads geocaches' associated images, spoilers etc. for later offline use. Available only with PremiumHow to use GC Offlinizer >>
 Load GCVote - downloads geocache rating
manual/user_guide/geocaching/gc_in_locus.1656075923.txt.gz · Last modified: by mstupka
Except where otherwise noted, content on this wiki is licensed under the following license: CC Attribution-Share Alike 4.0 International
